Workspace Settings: Setup Tab Explained
The Setup tab is how an agent gets connected to a workspace. With a machine enrolled, you start the agent from here in one click. Without one, the tab gives you every file and command to connect Claude Code, any ACP agent, Antigravity, Codex or DeepSeek Harness yourself, already filled in for this workspace.
This page is one of our workspace guidelines. It was checked against AgentRQ on November 16, 2026, and every screenshot comes from the storefront-api workspace.
Before You Start
Open the workspace, click the gear button in the top right, then Setup in the settings menu. The General tab guide shows where the gear is. While a workspace's agent is offline, its page also shows an Open Setup Guide button that lands here.
The Fast Way: Start It on a Machine
If one of your machines is online, the tab starts with Run it on one of your machines and a Start an agent card. Pick the machine and the agent, and AgentRQ starts it in the workspace's working directory. There is nothing to copy.
1. The tabs list the ways to connect: Machine, Claude, ACP, Antigravity, Codex and DeepSeek Harness. Machine is only there, and open first, while you have no machine enrolled.
2. Click Set up a machine to enrol one. Do it once per computer, and you can start this workspace's agent, or any other's, from AgentRQ.
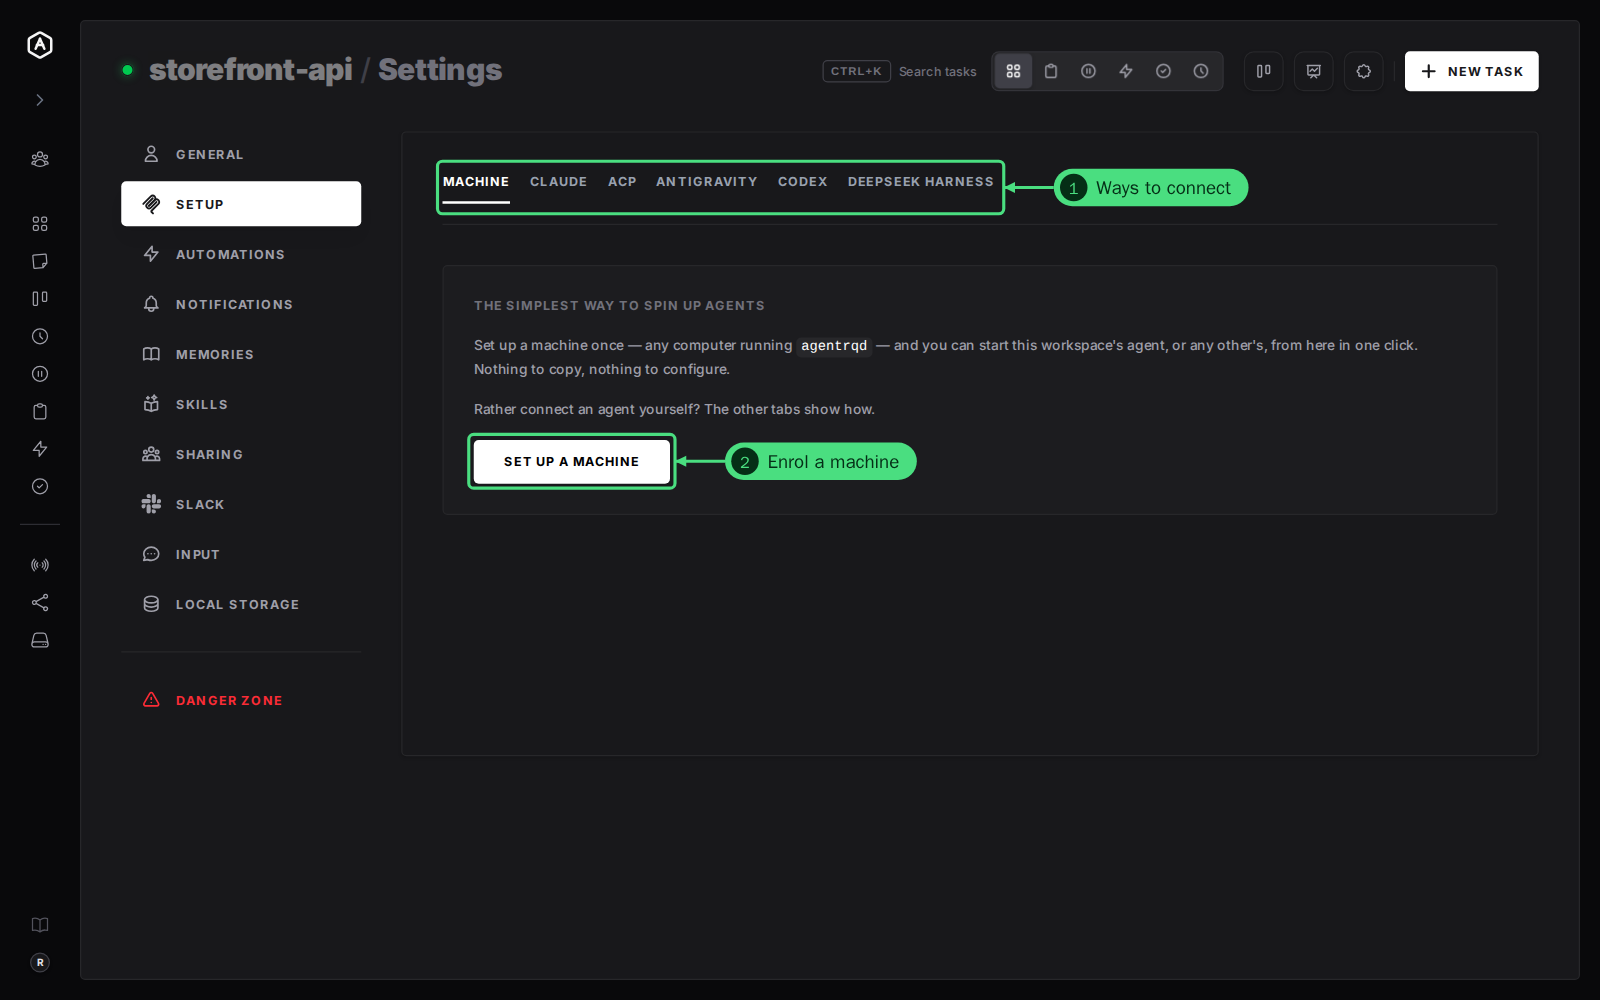
The connect agents guidelines walk through enrolling a machine for Claude Code and for ACP agents.
Step by Step: Connect Claude Code Yourself
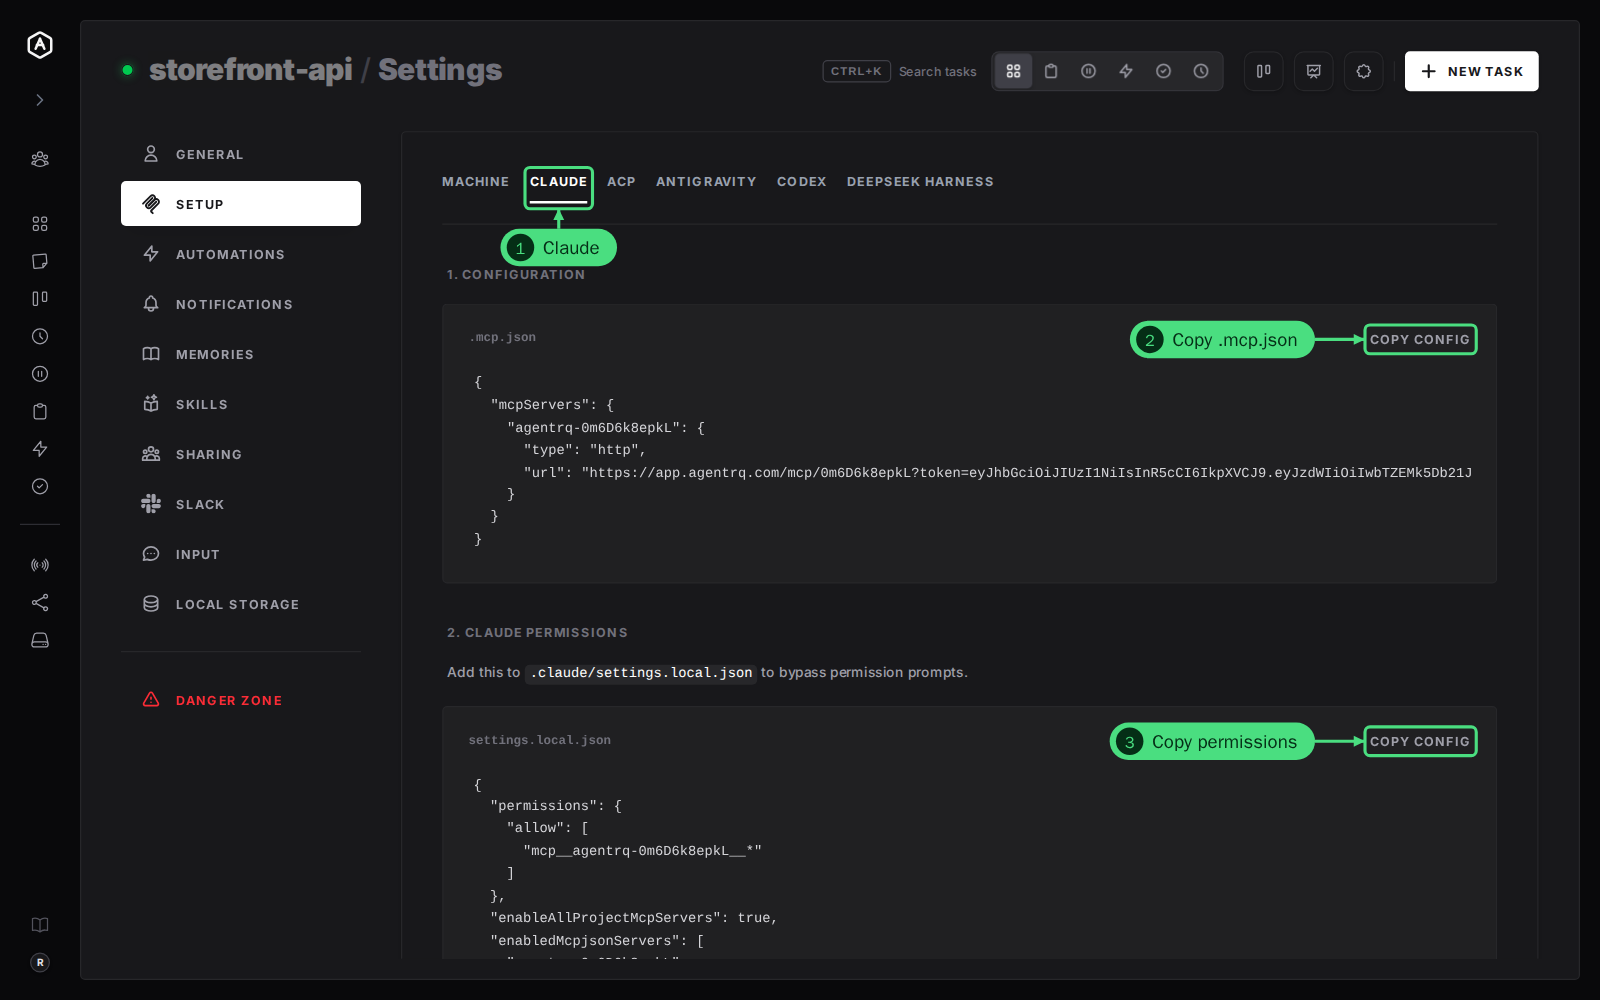
1. Click the Claude tab.
2. Click Copy Config next to .mcp.json and save it as .mcp.json in the project folder. It holds the workspace's MCP server URL, with the workspace's token in it.
3. Click Copy Config next to settings.local.json and add it to .claude/settings.local.json. It allows every AgentRQ tool, so Claude Code does not stop to ask before each one.
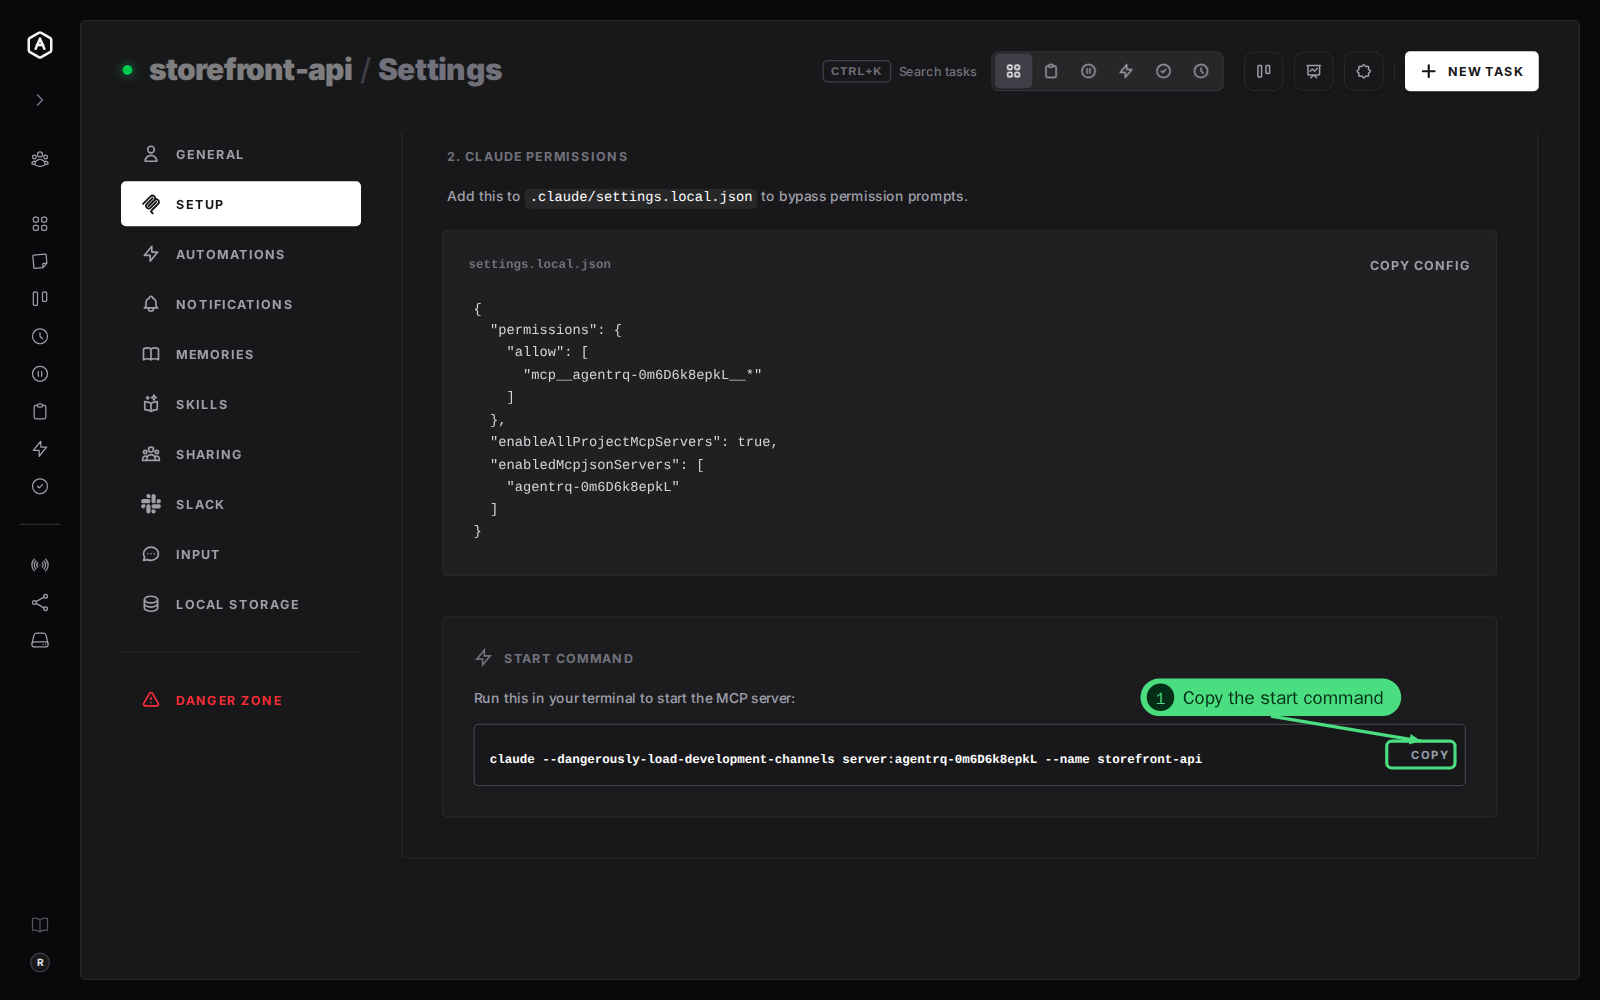
4. Copy the start command under Start Command and run it in the same folder. It starts Claude Code with this workspace as a channel, so tasks arrive in the session on their own.
Step by Step: Connect an ACP Agent
The ACP tab connects any agent from the ACP registry, such as Gemini CLI or OpenCode, through the ACP Gateway. Save the same .mcp.json from step 1 of the tab, then run each command from that folder. npx fetches the gateway each run, so there is nothing to install.
1. List agents. The name on the left of each row is what --agent takes.
2. Log in, if that agent needs it. It asks which method; an agent that needs no login says so.
3. Start the bridge. Tasks assigned to this workspace's agent arrive from here.
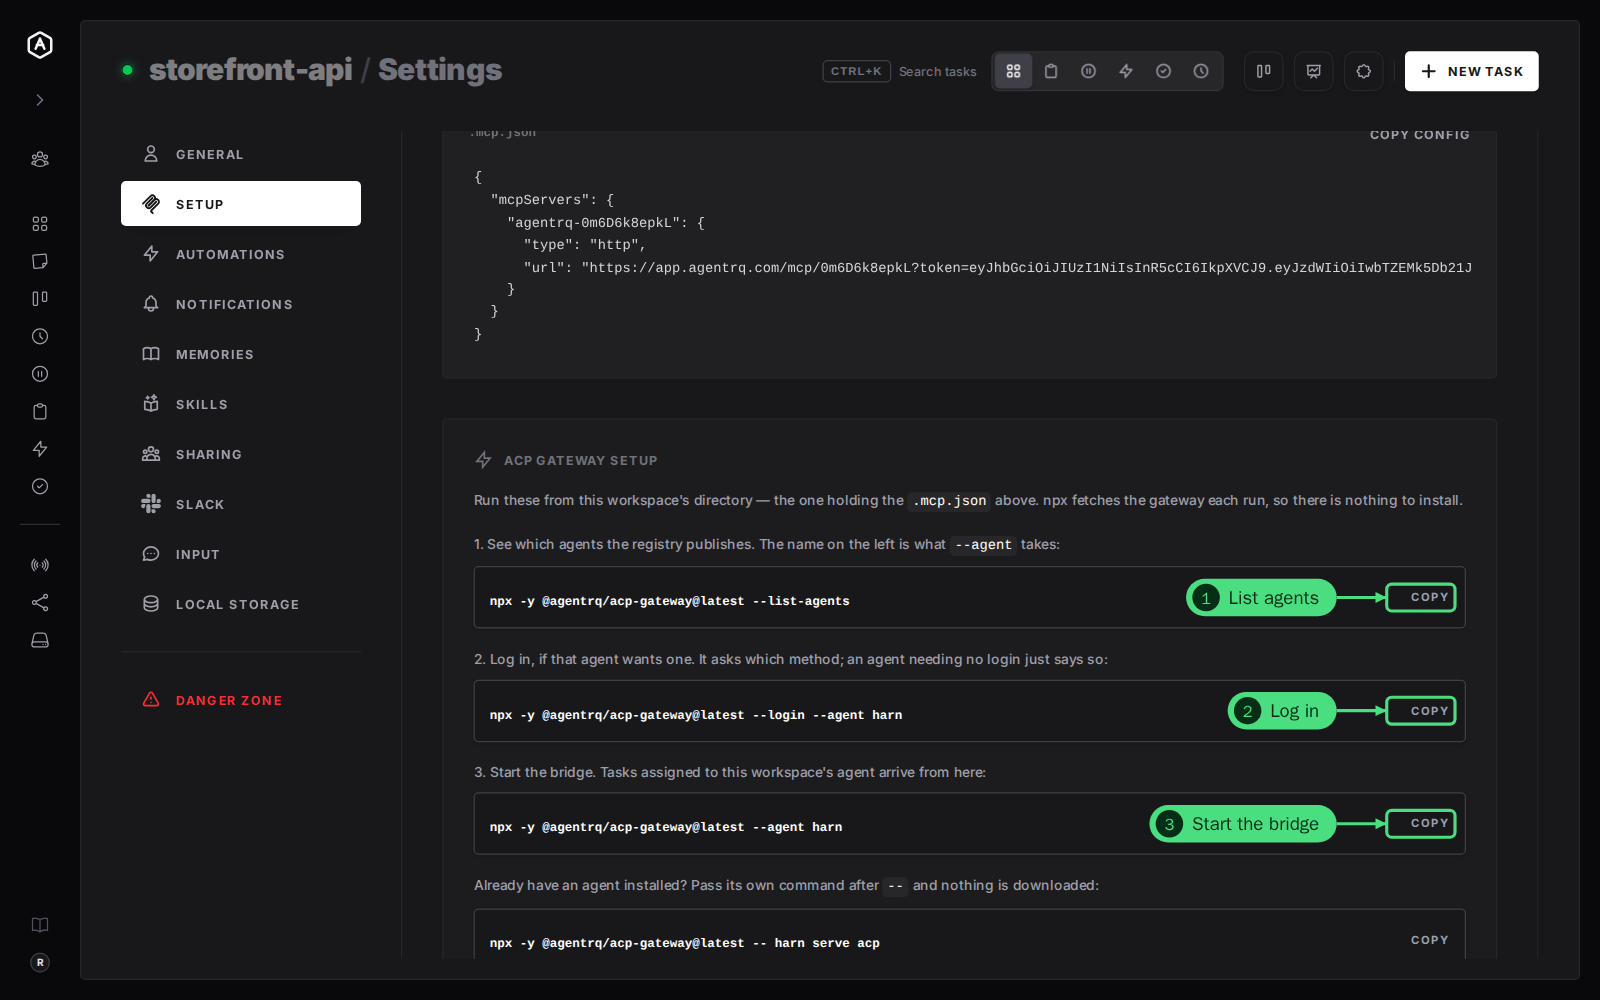
Already have the agent installed? The last command on the tab passes its own command after --, and nothing is downloaded. Downloads are checked against the registry's checksum before they run.
The Other Tabs
- → Antigravity. Antigravity needs a login before it opens a session, so it has its own tab: a login command, then a start command.
- → Codex. The same two steps: log in once, then start the bridge. Codex comes from npm on the first run.
- → DeepSeek Harness. A profile config to save, an optional tuning block, an install command and a start command, for either the browser UI (
dsh web) or the terminal (dsh). A profile serves one workspace.
FAQ
The config has my workspace token in it. Is that safe to commit?
No. Anyone with the URL can act as this workspace's agent. Keep .mcp.json out of git. If it leaks, see what to do with a compromised .mcp.json.
Why does the Machine tab not show?
It only shows while you have no machine enrolled. Once you have one online, the Start an agent card at the top of the tab replaces it.